
Mecanum Robots are one of the coolest type of robots around. They can drive in any direction and rotate easily. So why not put a computer stand on it and a second monitor mount. When laying in bed or sitting in your favorite chair or couch, just drive the computer up and start working or surfing the web for cooler robots (you won’t find a cooler robots than ours, sorry!). The mecanum drive allows you to position, shift, twist, etc. to get the perfect ergonomic placement.
We just made a custom mecanum robot using the custom length chassis and mounted a aluminum plate on the bottom and then mounted a computer tray on top then a mast to hold a large secondary monitor. Just for added features we added a 900W 24V AC inverter to power the monitor and charge the laptop from the robots batteries. A 24V 5A automatic charger is also mounted on the robot, so you just simply plug in the robot when not driving around and it charges up.
The first part is to make sure the mecancum chassis is built right. If using the custom length chassis, its important to make sure the width is right. The center of the wheels have to form a perfect square. (same length and width). This is because the inner roller wheels of the mecanum wheels are at 45 degrees. If you don’t make a square, the robot won’t be able to vector. See our Vectoring robot support page for more details. The other way to make sure you get the length and width right is to use one of our mecanum chassis that are already designed to have the proper length and width properties.
After building the chassis we wired it up with a couple SLA batteries run in series. We used two Sabertooth 2x12s so all 4 motors operate independently (this is necessary for mecanum robots). We controlled the enter robot using a Arduino Uno that supplied the brains and told the motor controllers what to do. The Arduino got its commands from a nrf24l01 2.4Ghz wireless transceiver. We wanted to keep it low profile so the majority of the chassis could get under a bed or couch, etc. cantilevering the computer and monitor over the bed or couch, etc.
The commands sent wireless to the robot were from a custom remote we made. We did not want a big lunky RC controller. We put a 4-axis joystick on top of a project box. The joystick was wired to another Arduino Uno and wireless transceiver. The controls have two modes that are toggled by the push button on top of the remote.
- One mode is conventional skid steering robot, left/right movement turns the robot to the left or right, forward/reverse causes the robot to drive forward and reverse. All this is controlled by promotionally pushing the stick fwd/rev and left/right. The third axis (knob twist) does nothing in this mode.
- The other mode is vectoring mode. In this mode pushing the stick left/right causes the robot to vector to the left and right. forward reverse causes the robot to go forward and reverse. So basically, which ever angle you push the stick the robot travels/vectors in that direction. The 3rd axis of the joystick is used to make the robot twist or yaw.
Part 2 of this blog will be the code used in the robot and the remote, which we will post on our GIT Hub too.
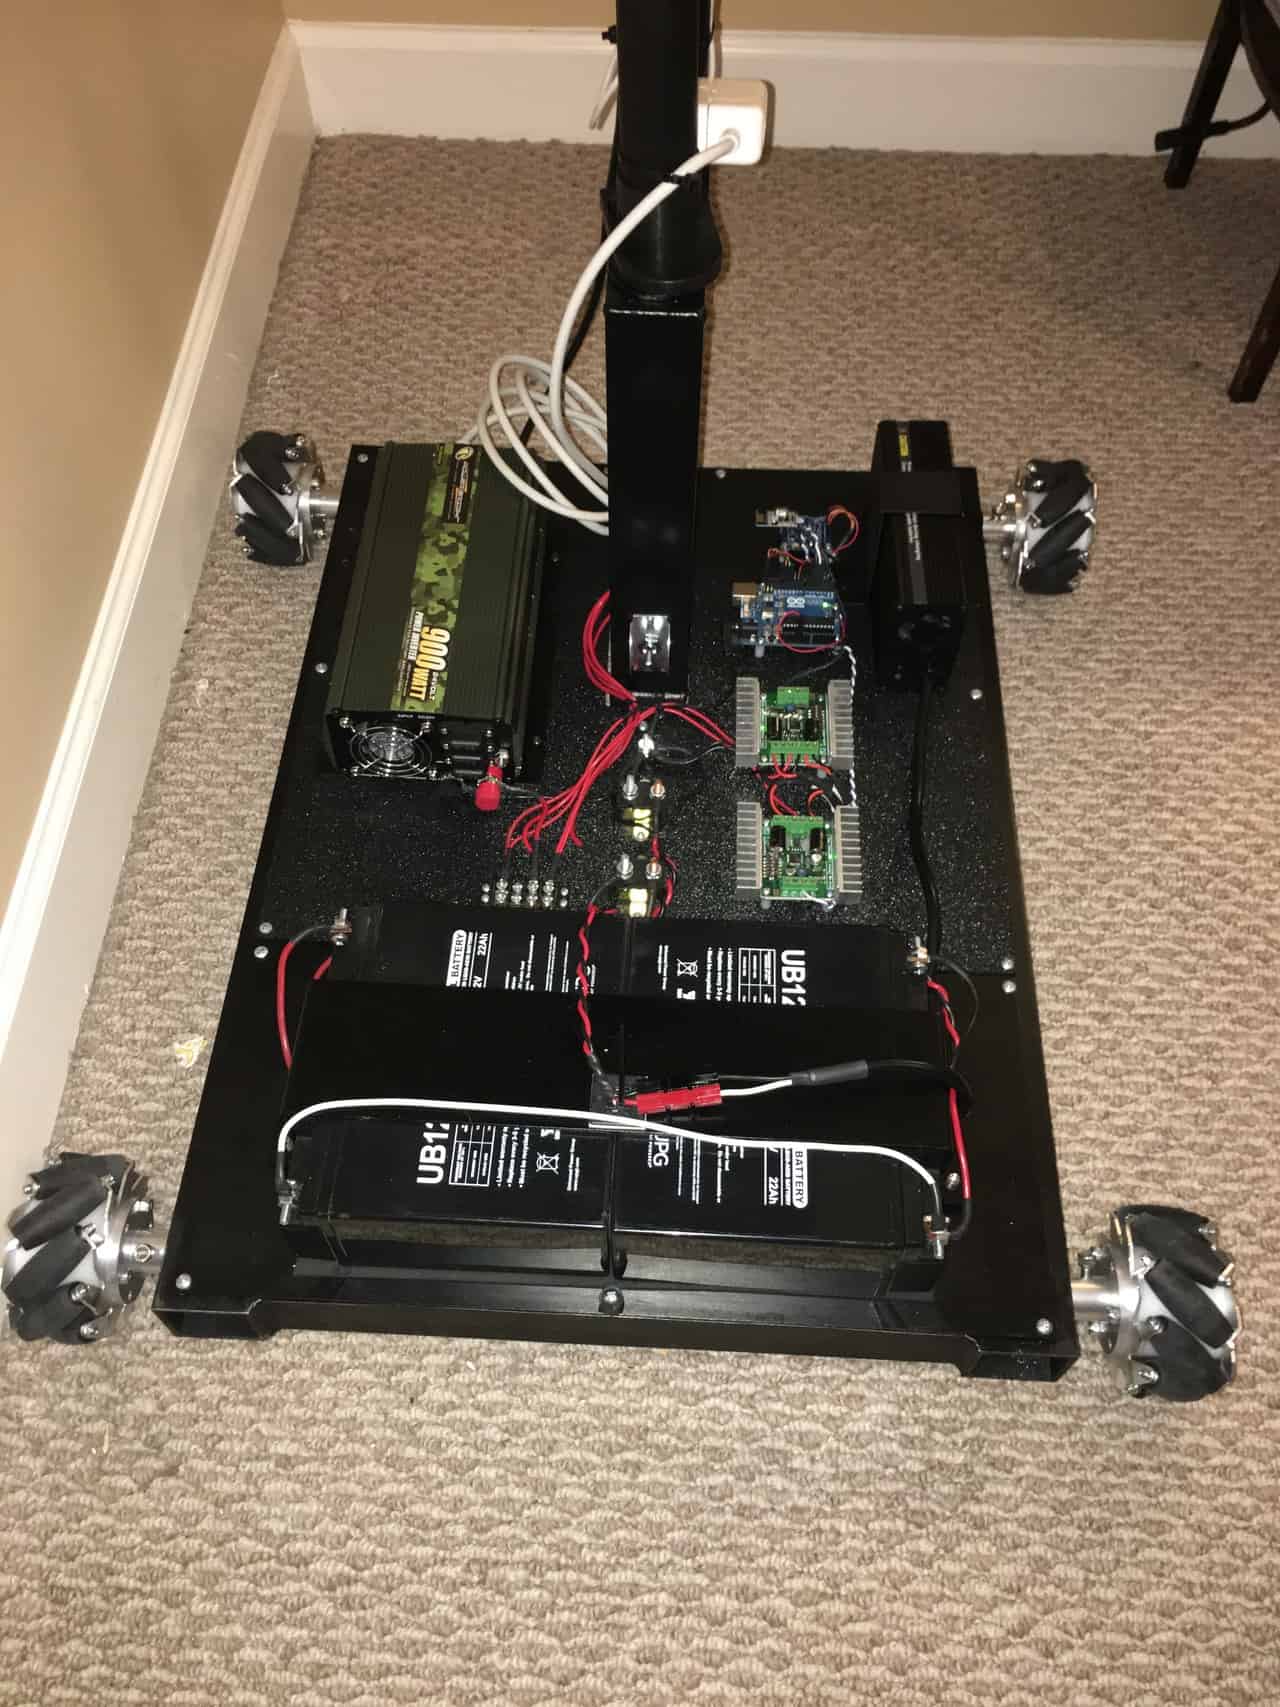
Mecanum Computer Robot Electronics layout
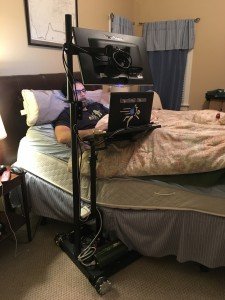
Mecanum Computer Robot next to bed.
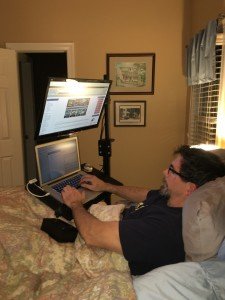
Mecanum Computer Robot in Use
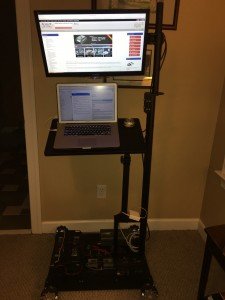
Mecanum Computer Robot Profile